SKÅL
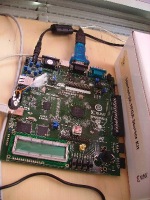
USAGE : FPGA Based Oscilloscope with Java GUI
Directory Stucture
- _dev_docs Only in svn avaiable
- build Compiled Applications
- FPGA Spartan 3A Starter Kit ready to run bit File with installer
- Linux Controller and OsciDummy Starter Script for Linux
- MacOsX Controller and OsciDummy Applications
- Windows Controller and OsciDummy Starter batch files
- required Libraries (Prerequisite) Java Serial Communication Libraries
- RXTXcomm.jar
- rxtxSerial.dll
- librxtxSerial.jnilib
- hdl VHDL Sources
- java Java Sources
- sourceforgeWebHome This Homepage
You need
- Spartan 3a Starter Kit
- Xilinx ISE (9 or higher)
- SKOL Package
Prerequisites
First, make sure RXTX, Serial Library, is installed.
- Windows
- RXTXcomm.jar goes in \jre\lib\ext (under Program Files\java...)
- rxtxSerial.dll goes in \jre\bin (under Program Files\java...)
- MacOsX
- RXTXcomm.jar goes in /Library/Java/Extensions
- librxtxSerial.jnilib goes in /Library/Java/Extensions
- (There is a fixperm.sh with the original RXTX source. Fix perms is in the Mac_OS_X subdirectory)
- (There is an Installer with the original RXTX source)
- Linux
- no testing yet... comments wanted
Program FPGA
- Generate Programming File yourself
- Project File Location: "hdl/SKOL".
- OR Use existing Bit File
- Project File Location: "build/FPGA/install_Skol.bat".
Java GUI
- Windows
- "build\Windows\SkolController.bat"
- MacOsX
- "build/MacOsX/SkolController"
- Linux
- "build/Linux/SkolController.sh"
- no testing yet... comments wanted
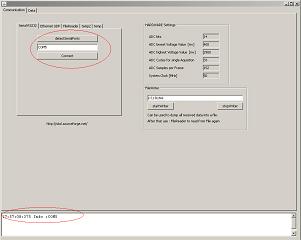
- Set SerialPort
- Use "DetectSerialPort" Button to Display all avaiable Ports in the Textfield.
- "Connect" Button
- Switch to "Oscilloscope View" Tab
- Click "Aquisition Start" Button
Use with OsciSimulator
- Windows
- "build/Windows/OsciDummy.bat"
- MacOsX
- Linux
- "build/Linux/OsciDummy.sh"
- no testing yet... comments wanted
- Start: OsciDummy
- Start: SkolController
- Switch to "Ethernet UDP" Tab.
- "Connect"
- Switch to "Oscilloscope View" Tab
- "Aquisition Start"
- "Connect"
- Use "DetectSerialPort" Button to Display all avaiable Ports in the Textfield.
- "Connect" Button
- Switch to "Oscilloscope View" Tab
- Click "Aquisition Start" Button


